Nuffnang Ads

Thursday, 1 June 2017

Kota Damansara Community Forest Reserve - Denai Tiga Puteri

Due to hectic schedule, we have decided to visit a community trail nearby.
We visited Kota Damansara Community Forest Reserve this round.

As suggested by the name, it is located at Kota Damansara.


After we had some light breakfast at the mamak store nearby, we headed to the entrance and the time was around 9am.

This community trail is located right opposite of the secondary school.
Parking is very limited hence you might need to consider to reach the place earlier.
Also, when you see a beautiful swamp lake, you will know that you're at the right place!!


As you can see from the photo, the swamp lake is located right beside the main road, where everyone park their cars.

Fast forward to the entrance, it is clean and well maintained.


As it was considered late when we reached the entrance, the place is kinda packed with people, most of them are cyclists.

Without further delay, we started our hike of the day.


*the trail map*


The trail started to split at the very beginning of it, to the left or to the right.
We took the right direction as we saw there was an red colored spray arrow on a tree pointing towards right side.
And that, appears to be the longer way to the peak.
After a few wrong turns, finally we are on the correct track.

Fear not, there are signboards like the below along the way, to let you know where your current location is. 
Map is easy to follow as the trail doesn't changes much since this map was built.
You can follow this map easily without much hassle.
Just follow the map and you will get to the peak eventually.


*us examining the trail to check whether we are on right track*


The trail was very much the same along the way.
There's nothing exciting and special to be seen.
However, it is a very easy trail. More like jungle trekking instead of hiking.


After around 1 hour into the jungle, we've finally reached this junction, where you finally see a very clear direction showing you to the peak!


From this point onwards, we only have 500m to reach the peak! YAY!!!
BUT NOOOOOOOOOOOOOOOOOO. 
The challenge has just started!!

The trail is steep down, then steep up up UP!!
My energy got drained by this last 500m distance hike.


*some 'stairs-like' assistance built by previous hikers I assume*

To pass through this area, you have to be very careful as the wooden 'stairs' are quite fragile.
I think these had been there for quite some time.
Wear and tear happens, especially these are installed in the jungle.

Crossed this, there are still quite some way to go.
The steep trail continues for another 150m, and it only ends when you see this.


Yes! The final signboard before reaching the peak!
Take the right direction, and you'll be on your way to Denai Tiga Puteri peak!
From this peak, you may see a long stretch of NKVE highway.

Well, how many trails or hills offer this view?


*the scenic peak - NKVE highway view*


After resting on the peak for a good 30 minutes, we decided to descend before the it gets too hot.


Back at the 500m junction, you need to ensure you take the correct path to go back to where you started.
Going left will lead you to Unity path, heading towards Section 10 exit (which is where we parked our car).
Going right will also lead you to Unity path, but this direction heading towards Section 9 exit.

It took us less than 1 hour to reach the exit as this time we've identified the route and we got out easily.

Summary of the hike:-
1. Easy hike. Last 500m is the hardest.
2. Bring sufficient water. Though it is easy but the trail is quite long and time consuming. Make sure you're well-hydrated during the hike.
3. Very limited parking space. Be sure to get there early to secure a parking spot.


Till next hike, ciaoz!!

Monday, 1 May 2017

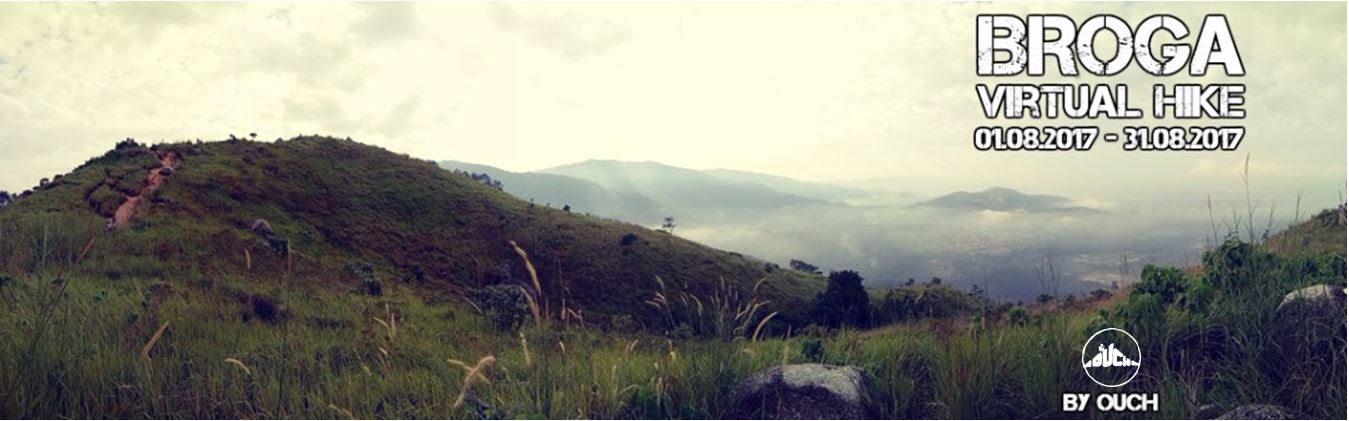
*Event* Broga Virtual Hike

Broga Hill, a hill famous for its beautiful sunrise.
Have anyone ever thought of going to Broga Hill for a hike, rewarded by not only the beautiful sunrise, but also with a beautifully designed pin and an exclusive dri-fit shirt which you can wear for all your other hikes or during your casual outing?
We present you, Broga Virtual Hike!
poster
All you need to do is register, hike, post a photo, and get rewarded!!

Event Details:-
Registration Fee : RM60.00 (Early Bird) / RM65.00 (Normal)
Event Location : Broga Hill, Semenyih
Event Duration : 1st August 2017 – 31st August 2017
Photo Submission Dateline : 3rd September 2017 (refer to FAQ No.5 for photo submission methods)


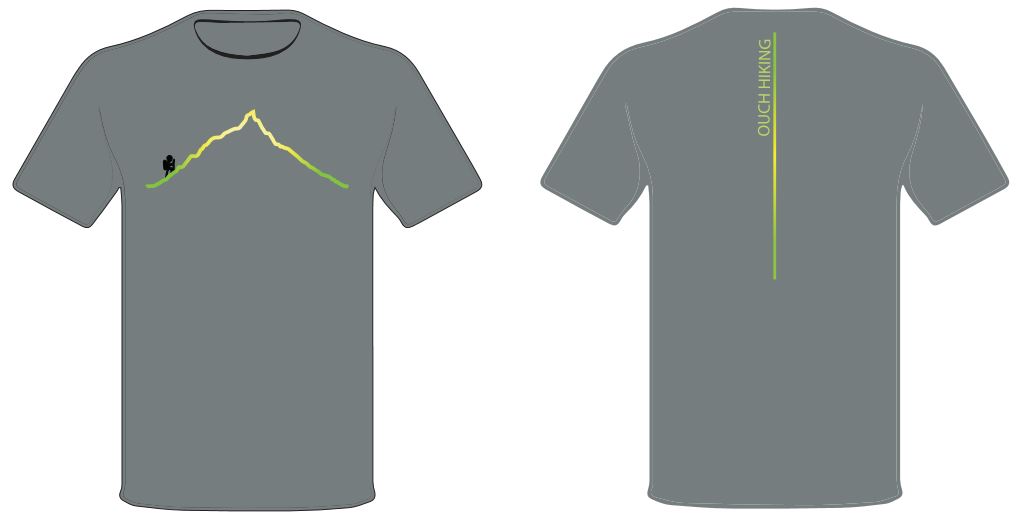
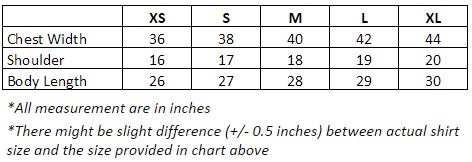
Shirt Design and Size Chart:-
Personalised Name at back of the shirt. Maximum 8 characters inclusive of spaces.
shirt design

Shirt size

Pin Design:-
pin design

Interested? What are you waiting for? Get your friends, register, pack your bag, and go hiking!
Last day of registration is on 15/07/2017. Hurry up before all slots are taken up!
Click here for registration! Early bird ends 31/05/2017!

Good luck and hike safe to all hikers!!

FAQs
1. Is there minimum age requirement to enter the event?
Yes. The minimum age requirement is 13 years old. Participants below 18 years old must acquire the consent of their parents/guardians before signing up for this event.

2. What are my transport/parking options for getting to and from the event?
Broga Hill is accessible by car only. You may opt to drive, or go by taking taxi/Uber/GrabCar. There is parking space provided by the estate owner at RM3 per entrance per car. The parking space is located right at the Broga Hill entrance.

3. What's the refund policy?
No refund is allowed once registration and payment is confirmed.

4. Is my registration fee or ticket transferrable?
No. Registration fee or ticket is not transferrable.

5. How do I submit my photo?
There are two methods, you can choose either one:-
(a) Instagram:- Post photo, caption yourregistration/confirmation ID, tag our instagram account (@ouch_hiking), and MUST hashtag #ouchvirtualhikebroga (please ensure you set your Instagram account to public, or else we are unable to see your photo)

(b) Facebook:- Like our Facebook page (Ouch Hiking) and post the photo on our page. Please caption your registration/confirmation ID, and MUST hashtag #ouchvirtualhikebroga

6. When will the entitlements delivered to my doorstep?
We will start sending out the entitlements on 15th September 2017. You will be getting your entitlements by end of September 2017. Please contact us if you did not receive your entitlements by end of September 2017.

7. How can I contact the organiser if I have other questions?
You may contact us at 017-318 3217 (whatsapp only) or email to us at ouch.lvt@gmail.com

Monday, 10 April 2017

What's in Our Hiking Backpack?

"Wah why you bring a bag that big for hiking?"
"Don't you feel that it's heavy?"
"Daypack only, no need to bring so many things la~"

Well, most of us has heard these words from our friends who do not hike, or from some newbie beginners.

While we still consider ourselves as beginner hikers, we would like to share what's in our hiking backpack, that requires us to bring such a size of bag for just a daypack hiking.

So this, is the backpack which we brought to almost every hike.
Hiking bag can be bought from Sports Direct or Decathlon (if you're at KL or Selangor).

 *Karrimor Super Light - 35L*

Now, let's share what we brought with this 35L bag.

1. Hydration Bladder

For those who doesn't know what this is, it is a bag for you to fill drinking water and drink using the bladder connected to the bag.

We are using hydration bladder in replacement for normal water bottle.
For us, it is easier to drink from this rather than drinking from bottle.
Also, it's easier to carry in the bag.

Hydration bladder comes in 3 sizes - 1 / 2 / 3 litres.
Also, can be purchased from Sport Directs or Decathlon.


2. Hiking Poles

Hiking poles or trekking poles are optional.

It is to assist hiker during ascend or descend.
For those who have bad knees or weaker legs, you might opt for usage of hiking poles.
Ascending and descending will be much easier with these.

For purchase of hiking poles, we would recommend to get them from Sports Direct.


3. First Aid Kit

This is another important thing in a hiking backpack.

Yes! A FIRST AID KIT.

Most hikers ignore or doesn't even consider to bring one during their hike.
To which I think, is reckless.

You never know whether you will be injured or in distress in the woods.
Or you never know, maybe hikers from other groups need some first aid assistance!

It is always wise to get ready a first aid kit in the hiking backpack.

For emergency.


4. Emergency tools during rainy days

Yup. Another must-have items in the hiking backpack, especially during rainy seasons.

Climate change is VERY VERY UNPREDICTABLE.

From our very own experience, we went to Chiling Waterfall in the morning, with bright sun and hot weather.
We were back to car safely and in hot weather as well.
Then, there was sudden change of weather and it rained heavily for the rest of that day.
There were people stuck in the waterfall, unable to come out and had to wait for rescue.

We are unable to predict what would happen during a hike.
It's best to prepare the umbrella before it rains, literally.

Some of the items we carried in our backpack are:-
a) Poncho (disposable raincoat)
b) Emergency blanket
c) Lighter
d) Waterproof matches


5. Waterproof pouch / Zipped Bag

Ok. This item is super optional.

For us, we like to keep our things, especially our gadgets (phones, camera, wallet, etc.), DRY.

The waterproof pouch/zipped bag is very useful whenever you're hiking or visiting to a place with water (eg. waterfall).
Also, if rain decided to visit during a hike, these are very useful as well.


6. Torchlight / Headlamp

These items are mandatory, especially if you're going for a night hike or starting a hike in the dark.

Our advise to all hikers, please use a proper torchlight / headlamp instead of lightening up the trail using the built-in torch in smartphones.

We've seen hikers using the smartphones along the way, trying to lighten up the trail, balance themselves, trekking in dark, AND taking care of their phones (we all know how precious our smartphones are, and we do know how heartbroken we are if our smartphones fell and cracked).

Please, get one proper torchlight (you can get a decent torchlight at Mr Diy from RM4+ onwards) and use the torchlight if you're going for a hike in the dark.
You'll be grateful you don't have to take care of it as much as you have to take care of your smartphone.

Plus, what if smartphones went out of battery and you need to call someone for emergency?


7. Plastic Bags / Portable Ashtray

Everyone says, be a responsible hiker!
One way of becoming one, is to take care of the nature.

DO NOT POLLUTE THE NATURE!!

No doubt, most of us enjoy the view at the peak.
We would picnic and rest at the peak. Take all nice photos and have all the fun we can at the peak.
And then, some of us forgot to bring something back.
Something which is called - RUBBISH.

We've seen photos of rubbish everywhere in the woods.
Is it really hard to bring back your own rubbish?

Just bring a plastic bag, throw all the rubbish in, and bring it down and throw at proper place.

If you can bring all the foods and beverages onto the hill, why is it so hard to bring the leftovers down?
It doesn't take up much space in the bag, and it doesn't weight as heavy as the foods and beverages which you bring onto the peak.


Another small part to be done is to bring a portable ashtray.
It would be unrealistic to ask a smoker-hiker not to smoke a cigarette during the entire hike.

While it would be good if one can stop smoking during the entire hike; but if they can't, ask them to be a responsible smoker-hiker then.

Bring a portable ashtray and fill them with the ashes and cigarette butts.
Don't throw the cigarette butts anywhere in the woods.

Imagine if the cigarette butt is not properly extinguished, and it was throw onto the ground with dry leaves, you might be the culprit who started a fire in the woods.

So please, be a responsible hiker, to yourself, to the nature, and to the other hikers.

These portable ashtray can be bought from any Daiso.


8. Walkie-Talkie

While some might find that these might not be important, we always carry one each no matter which mount or hill we go, in case we need it to communicate.

The radio transceiver, a.k.a. walkie-talkie, might be a life-saving tool.

Sometimes, one of us might go further front for scouting.
Sometimes, one of us might want to go first instead of waiting for other slower hikers in the group.
Sometimes, one of us might even got out from the group and lost sight of others, and got lost.

This is where we need the walkie-talkie.
If there's at least a pair, we can communicate with each other even if we can't see each other, provided if we are still within the permitted range.


The above basically wrap up what's inside our hiking backpack which we brought to almost all of our hikes - the basic tools which we think are important.

All these, plus some foods and beverages, and some other optional stuffs such as cap, windbreaker, face towel, sunglasses, etc., sums up why we need such a big backpack for a daypack hike.

So, what are the things that you would bring for a daypack hike? 

Till the next blog post, ciao!!


Wednesday, 8 March 2017

Gunung Datuk Daypack

After getting off from hiking activity for almost a month (CNY break - kononnya),
We finally decided to get back to the nature!

This time, we visited Gunung Datuk!

Located at Rembau, Seremban, Gunung Datuk is famous for its rocky peak and sunrise view!

To get here, simply Google or Waze 'Gunung Datuk' and you will be led directly to the entrance!
Also, once you exit toll (Pedas/Linggi), you will see signboard leading you to Gunung Datuk along the way.
It is around 1 hour and 10 minutes drive from KL. Pretty near I will say =)


One advise for those who keen to hike here, do CARPOOL if you are going in groups.
The parking space is very limited near the entrance.
You might need to park further a bit and walk to the entrance if needed.

Be reminded, DO NOT BLOCK THE WAY!
You might block the way of ambulance or fire truck in case of any emergency.

 *where we parked our car - along the roadside*

 *us walking towards the proper carpark a.k.a. entrance of the trail*

 *the carpark*

 *the entrance with sun-rays through the trees!*

*another view of the entrance - it suggested that the trail to peak is around 2km. In fact, according to my team's tracking, it's around 4km per way*

The trail starts with descending a well maintained flight of stairs as seen in the photos.
Enjoy your time here, as it will be the last nice scene before the start of the nightmare (ok lah it's not that scary but the trail after this is not easy either).


 *the view which welcomes you after that flight of stairs*

 *small bridge*

*the view from other side at the start of the trail* 

*the start of ascending? No, not quite yet*

After crossing the small bridge and hike up a bit, you will get to a cottage, where they collect the entrance fee/permit here.
You will need to register yourself here. 
For big group, it is recommended to get ready a name list of participants containing names, IC and contact number, and just pass the list to the ranger to save your time.
Permit is RM5 per pax.


 *the emergency contacts*

*the map of the trail*

After this cottage, is the start of the challenging part!
I've read most hiking blogs mentioning that the challenging uphill part is only like for one hour, and the rest is more of flat ground.
But NOOOOOOOO.
It turns out that the trail is ALL THE WAYYYYYYYYYYYYY UP until the very peak.

Yeap, it is that challenging.
For those who aren't too fit, please take your time and just follow your own pace.
Do not rush things. The peak is always there.


*a super huge tree where you can see on the way*

 *uphill*

 *still uphill*

 *more uphill*

 *forever uphill*

Though the trail is challenging, but it is very clear.
Direction of trail is marked with red paint along the way (on the rocks and trees as you can see from the photos).
There is no need to fear for lost in the woods as there are many other hikers along the way as well.
Just need to be careful and take one step at a time.
Do not lose your balance or you will fall straight down!

After around one hour hike, we have reached the rest point.
This is the only proper rest point for this trail.

We took a 10 - 15 minutes break here before continue ascending to the peak.


*the starting trail from rest point is still uphill*

From this point onward, we did not take much photo of the route.
We are tired, and the trail is all uphills.
Well there are 2 short distance where the trail is of flat ground, but it is superrrrrr short.
So do not expect you will get much rest there.

After around 3 hours of hiking uphill, we are finally at the peak of Gunung Datuk!!
Despite of the hot sun above us, the peak is super windy! 
All the tiredness and sore gone away just like that once we reached the peak.
However, there is no view at this place.

*the must-have group photo with the signboard of the peak*

The adventure does not stop here.
You can still go up further for stunning view!
But first, you will need to climb few flights of stairs installed by previous hikers.

*Long and tall stairs*

*the view of the same stair from above - quite high isn't it?*

After climbing those stairs, you will reach the middle and this view welcomes you.
Stunning?


To get to the highest peak, you will need to climb up these stairs.

*the last two flights of stairs before reaching the highest peak*

And TA-DA!!!
The breathtaking view awaits you!!


We stayed at the highest peak for around an hour, just for taking photos.
After we are satisfied with all photos and as the peak become hotter and hotter, we decided to descend to the initial peak to get some rest and recharge ourselves.

Another reminder here, take turn and be patient when using the stairs.
Everyone wants to get to the highest peak, and everyone wants to go back down.

After we rested for around half an hour, we started to descend.
While we thought descending will be much more easier than hiking up, we are WRONG.

As the hill is very steep, descending becomes harder as it requires more knee and muscle strength.
We took around 1 hour 30 minutes to descend, but our knee and leg muscle are sore and tired. Our legs feel squishy at the end of the trail.
So our advice, wear knee support if required, and bring hiking poles with you to reduce the stress on knee.

Summary of the hike:-
1. Moderate to difficult hike. Not recommended for beginners, unless you have strong physical and stamina
2. Limited parking, recommend to carpool (carpark normally full at around 7am)
3. Hiking permit at RM5 per pax
4. Bring minimum 2 litre of water per pax
5. Knee support and hiking pole is strongly recommended for those who have weak knees
6. Around 3 hours (slow pace) hike up; 1 hour 30 minutes hike down
7. Be patient and take turn to climb stairs to avoid accident

That's all for today's update.
Till the next hike, ciao!!